Mastering Overlays: How to add CapCut overlay text and video for Stunning Edits (December 2025)
This step-by-step guide teaches how to add text and video overlays in CapCut. Enhance your videos with creative layering techniques for professional-quality edits using CapCut’s powerful tools.
Introduction
If you are looking for ways to add CapCut overlay text and video, you are in the right place. This article will guide you through the process.
The term overlays refers to one of the video capabilities that allows it to overlap with the other elements on the same screen.
This task can be accomplished using different video editing apps. Many video editors enable their users to overlay text and videos, but the best among them is Capcut.
Read this article, ‘How to add Capcut overlay text and video,’ for a step-by-step guide.
What are overlays in CapCut?
In CapCut, overlays are additional templates, such as images, text, or video overlays, placed over the background to enhance the video.
Video creators mostly add overlays to make their projects more engaging and professional.
With CapCut’s overlay feature, you can easily add overlays and blend multiple effects with the green screen effect. Using the best overlays in CapCut, you can transform your essential content into eye-catching and professional content.
CapCut superior video overlay capabilities?
CapCut has a robust set of overlays and advanced features. It is known for its user-friendly interface. Moreover, it has made video editing simple and easy with its wide range of overlay formats and customizable options. It also has a set of pre-designed overlays to add a magical layer to your video. It also includes blending options for a polished look.
The CapCut overlay feature can be utilized in multiple situations and environments. You can include watermarks or stickers in the video, edit videos using a green screen, add different effects to the video, or create captions for the video. Overlays can also be applied on pictures.
How to add Capcut overlay text and video?
You can easily add text and video overlays using CapCut. Below, you can get a complete guide about how to add Capcut overlay text and video.
How to add text overlay in CapCut?
Text overlays can make your video more stunning and intriguing. Follow the below steps to add text overlay in CapCut;
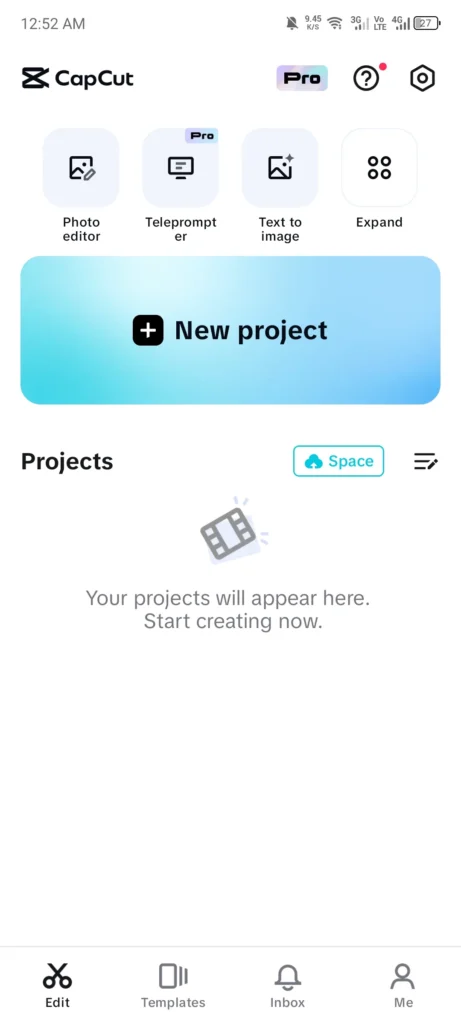
Step 1- Open the app
Open the CapCut application.
Step 2- Import video
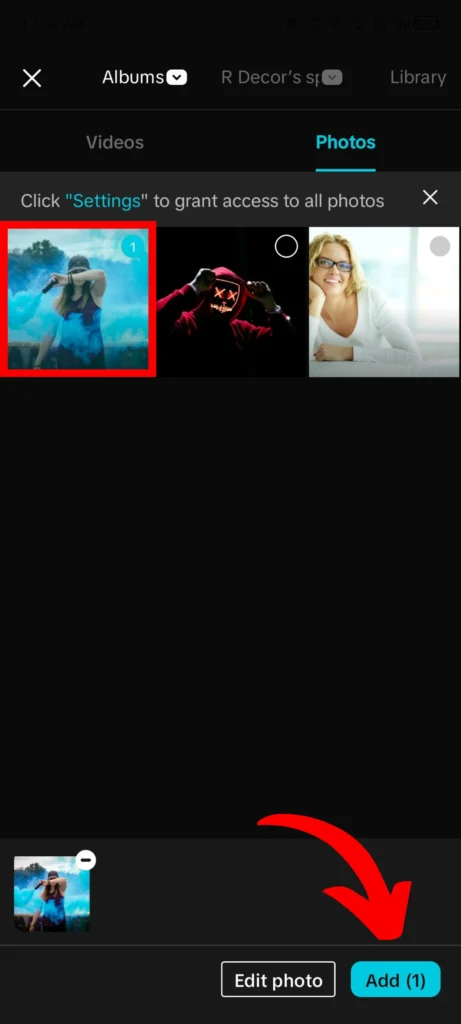
Add the desired video to the new project.
Step 3- Use the text tool
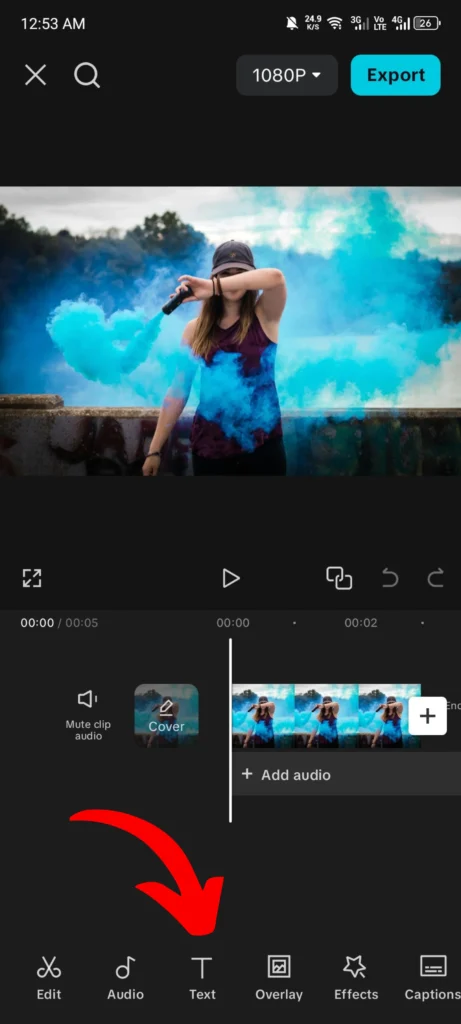
Select the text option from the toolbar, which includes a menu containing several options such as ‘Add text’, ‘Auto captions’, ‘Stickers’, or ‘Text templates’.
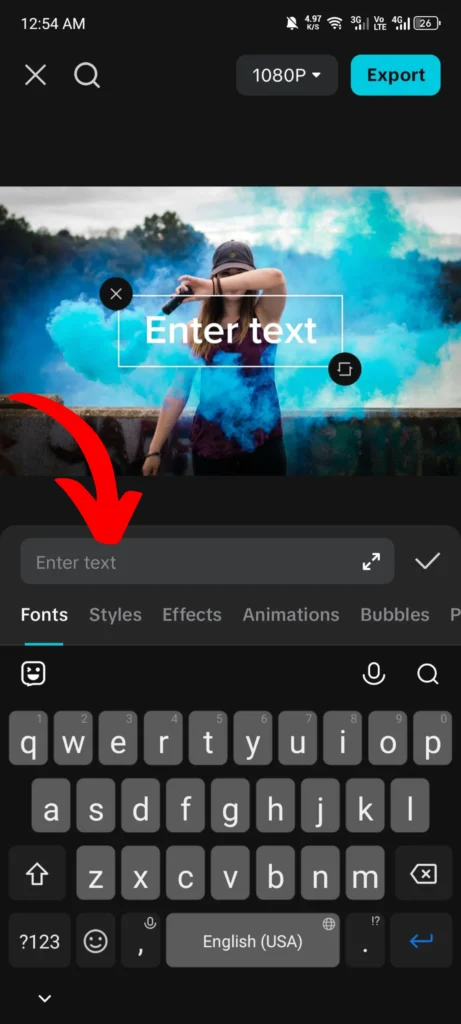
Step 4- Include the text
Tap the add text option and manually enter the text. You can also select the ‘Auto captions’ or ‘Text templates’ options if you don’t know what to write.
Step 5- Tailor the wording
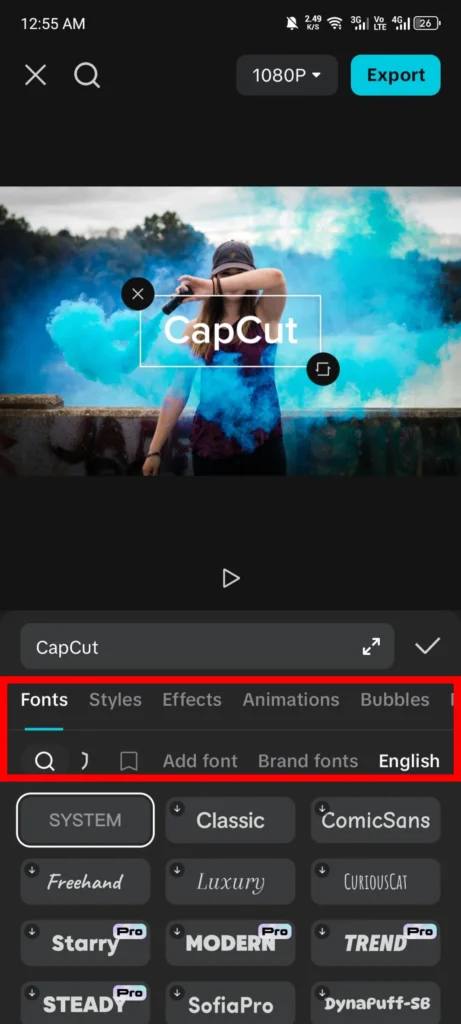
Adjust your text by using different fonts, styles, and colors.
Step 6- Text positioning
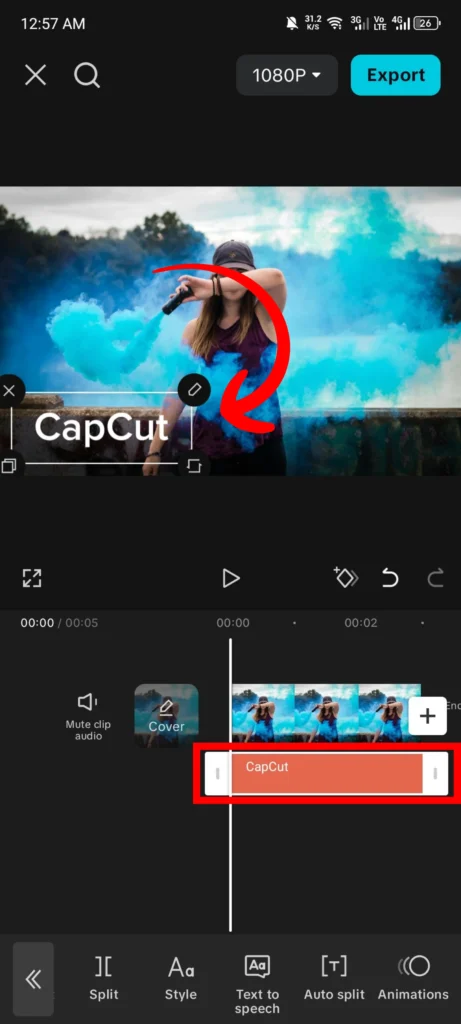
After adjusting the text, move it across the preview screen by dragging.
Step 7- Export the video
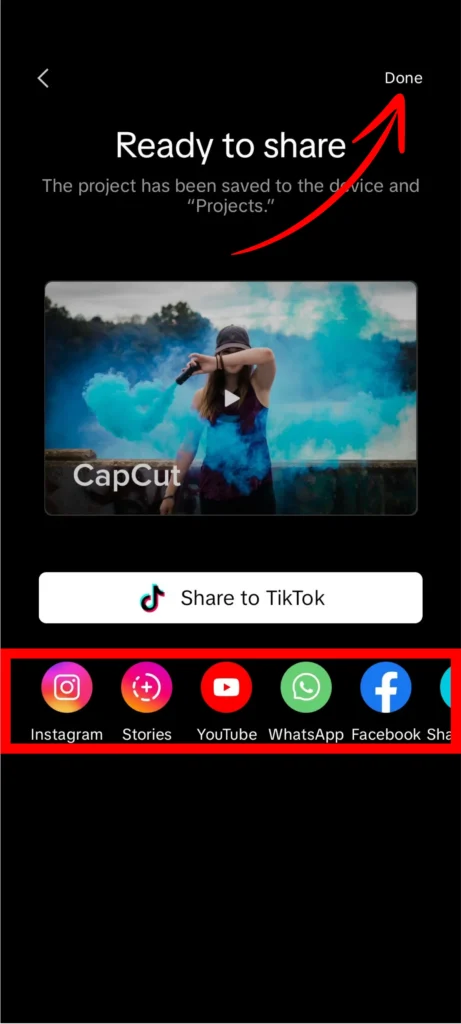
After positioning the text, export the final video.
How to Add Video Overlay in CapCut?
Video overlays are additional overlays that can be added to any video using CapCut software. They are used to create a layered look. Follow the below steps to add video overlay,
Step 1- Download the application
Download the CapCut software and open it.
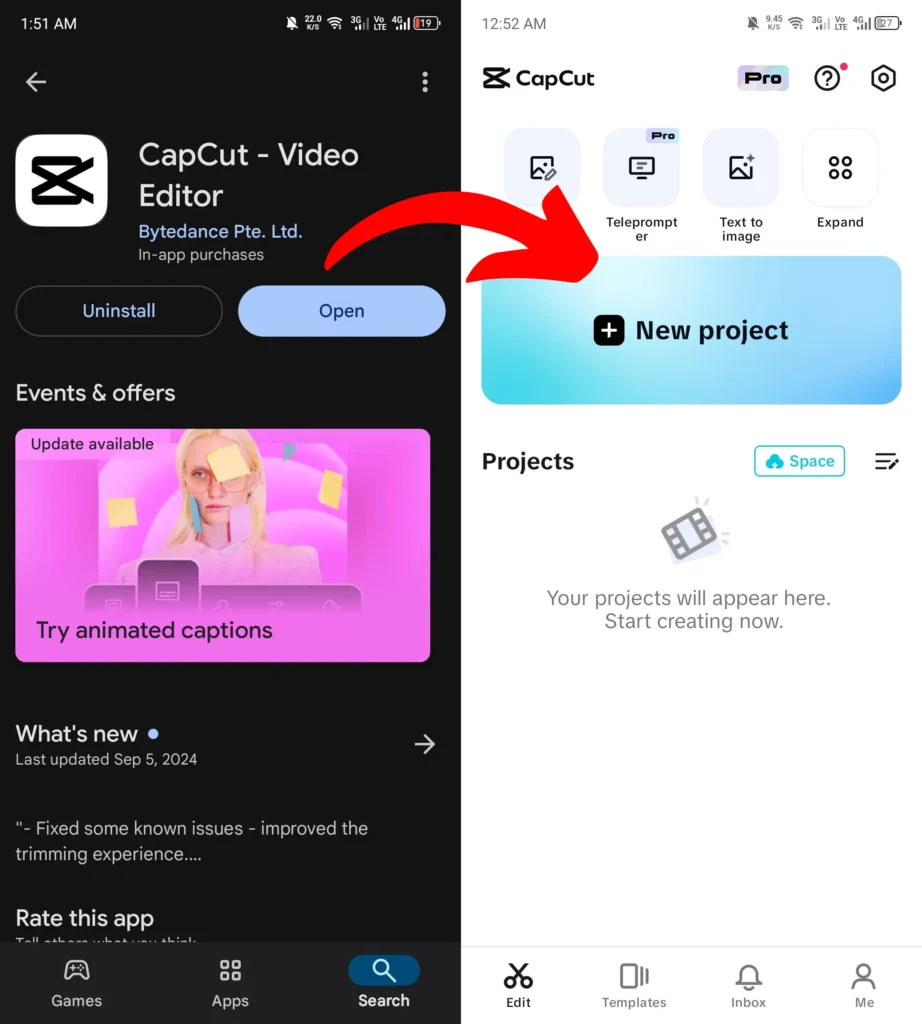
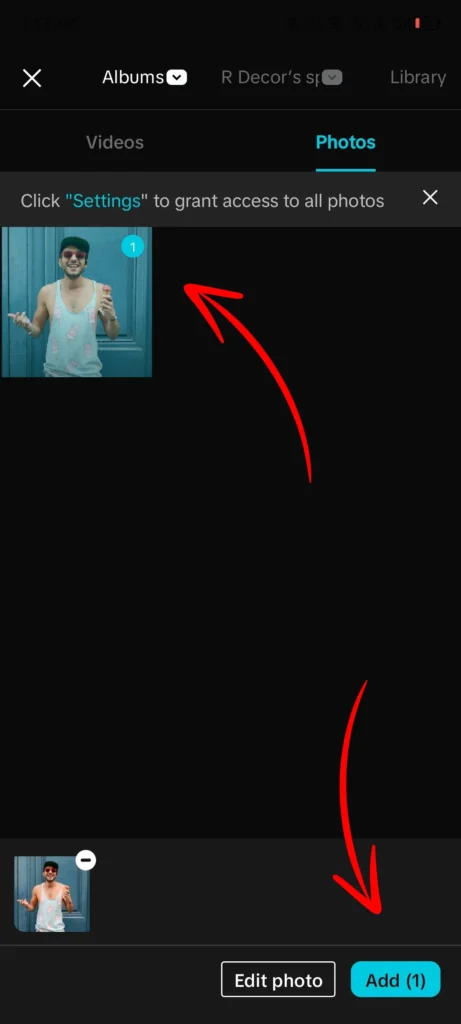
Step 2- Import your file
Import the desired clip.
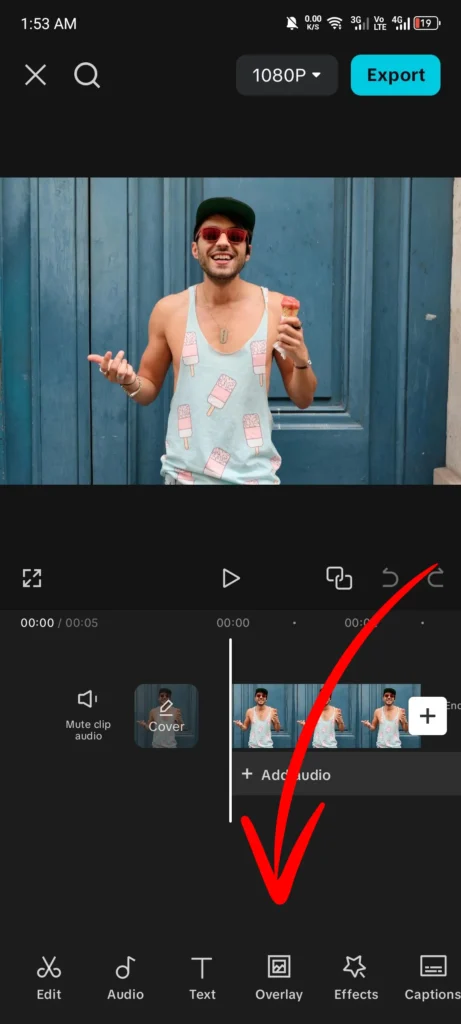
Step 3- Go to the toolbar
Now, go to the toolbar, slide it until you find the overlay option, and tap on it.
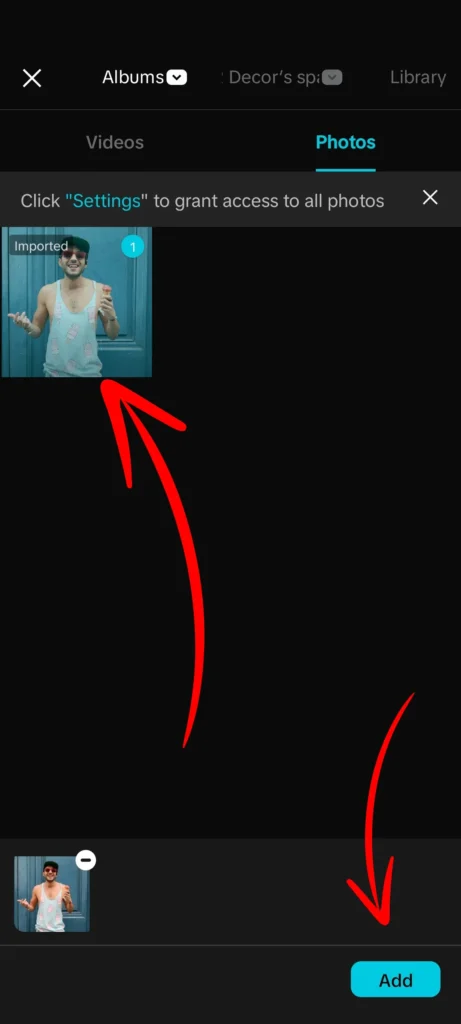
Step 4- Add CapCut overlay
Click on ‘Add CapCut overlay’ and select the video from the gallery to overlay.
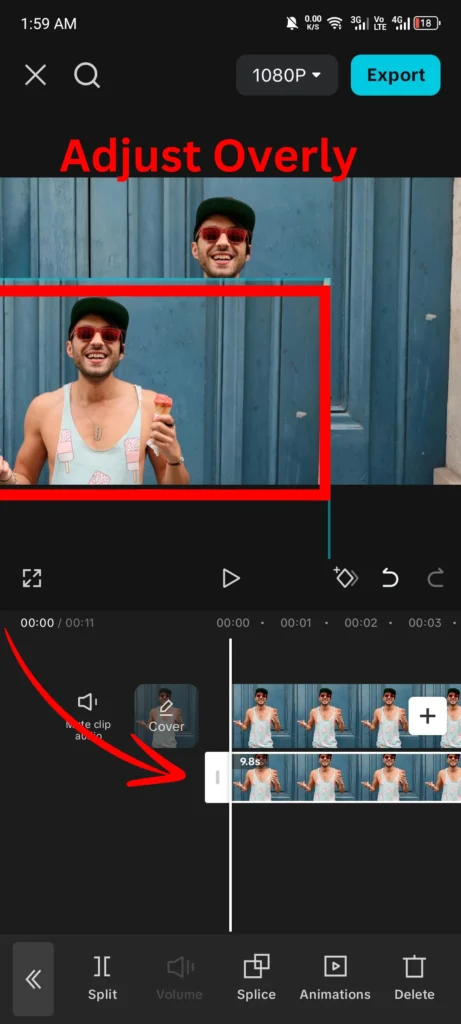
Step 5- Adjust overlay
On the image or video to overlay. Adjust the overlay video’s position and size by dragging it.
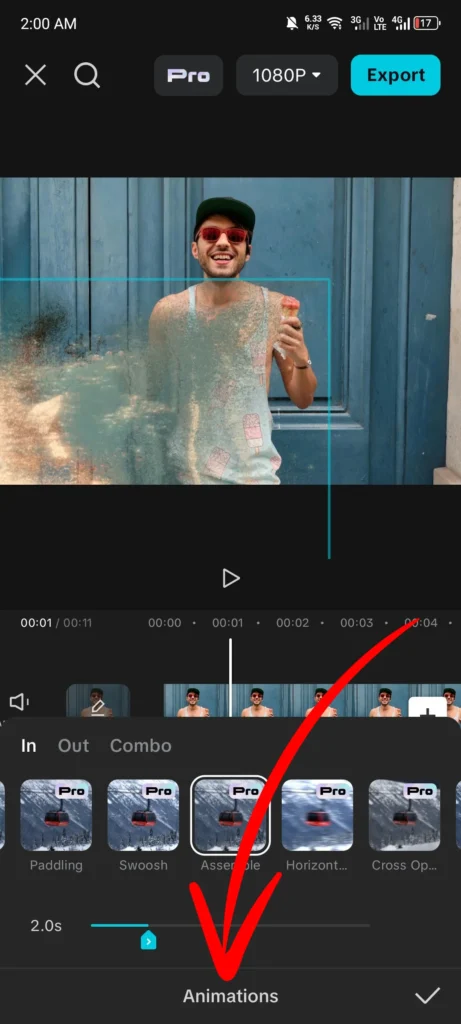
Step 6- Use filters and multi-transition effects
You can add filters and other transition effects to enhance the overlay video appearance.
Step 7- Export the final video
After adjusting, your video is ready. You can easily save it by tapping the export button.

How to add Capcut overlay text and video Using a PC?
A step-by-step guide is written below about adding overlays in CapCut using PC.
Step 1- Download CapCut’s desktop version
Install the desktop version of CapCut on your PC and open it.
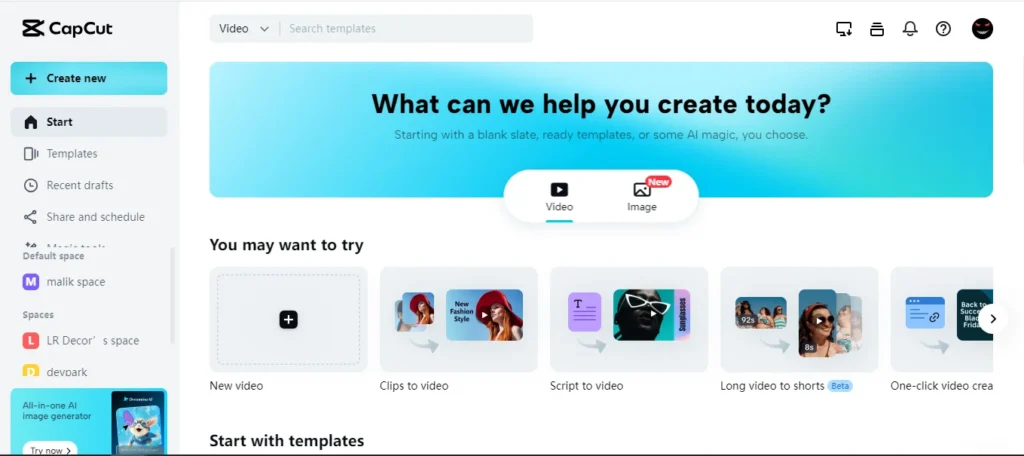
Step 2- Import files
Select the file to import and click on the ‘+’ button to add background video.
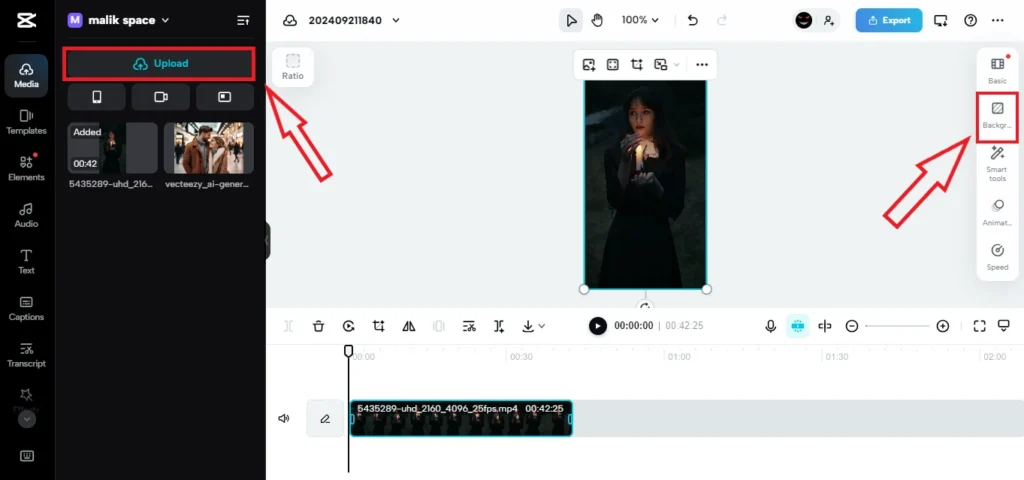
Step 3- Add an overlay
Go to the media library and click on the ‘+’ button again
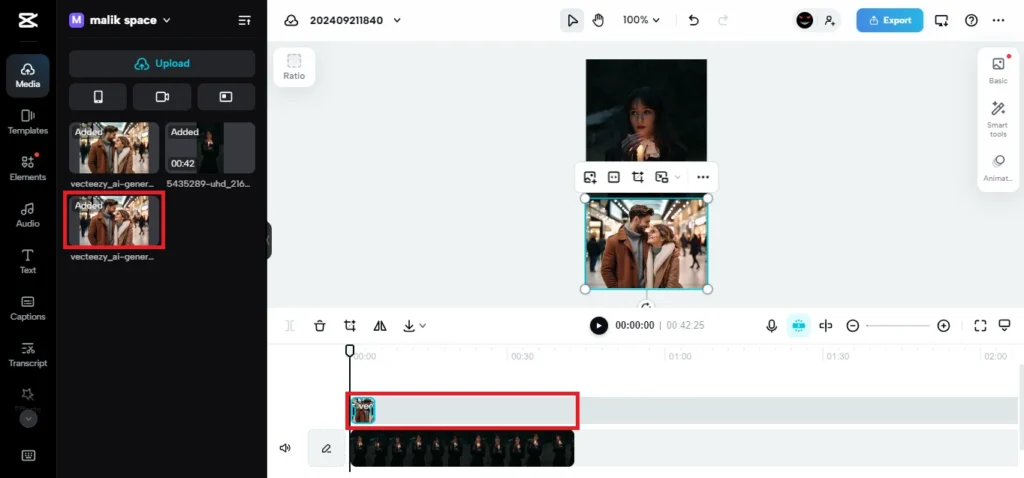
Step 4- Separate the overlay media
Click and hold the content you want to overlay and drag it upwards to create a new video track.
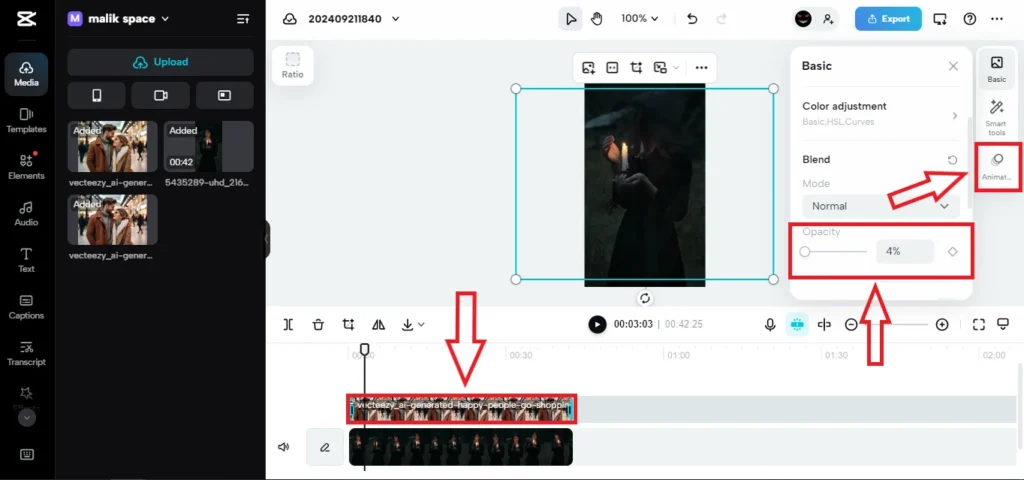
Step 5- Adjust the overlay video
Adjust the overlay video by resizing the corners and dragging it to appear where you want.
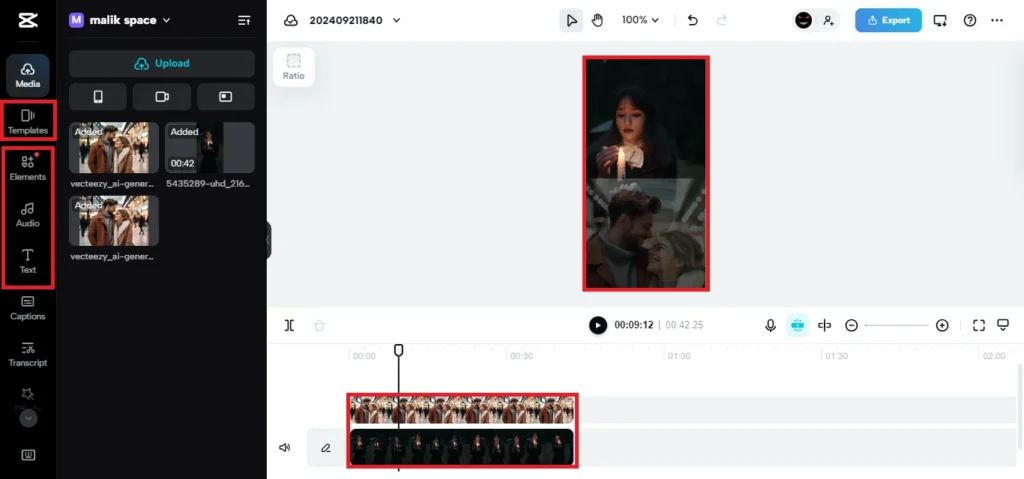
Step 6- Add additional elements
You can add other elements such as text or stickers.
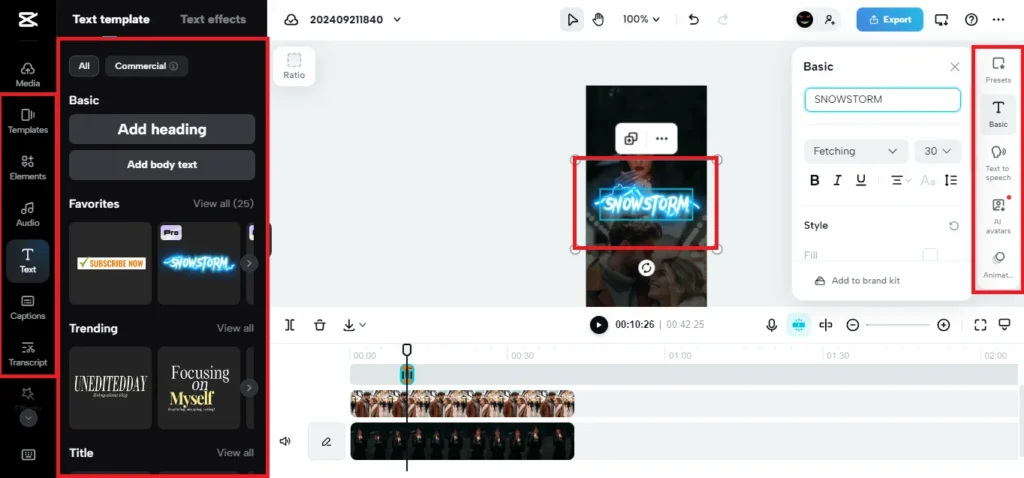
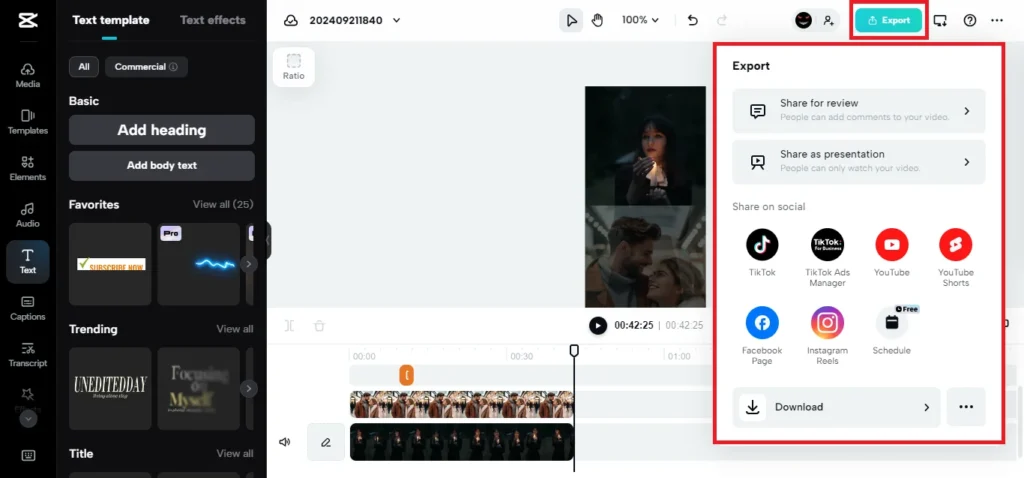
Step 7- Export the project
Your video is ready to export.
Where can I Find Trending CapCut Overlays?
You can easily find trendy overlays at these places,
CapCut template library
Go to the template section within the app. Here, you will find a variety of trending templates.
TikTok
CapCut users upload trending overlays on TikTok. You can check by using hashtags such as #trending CapCutoverlays. You can also use flash overlays for tiktok videos.
Youtube tutorials
Mainly, content creators on YouTube showcase trending overlays along with the tutorials. Usually move overlays are famous which youtubers use alot.
Social media communities
Social media communities like Reddit, Facebook, and Instagram also provide information about trending overlays.
How to Use CapCut to Include Changing Overlays?
Follow these steps to create a dynamic video by changing the overlays feature in CapCut.
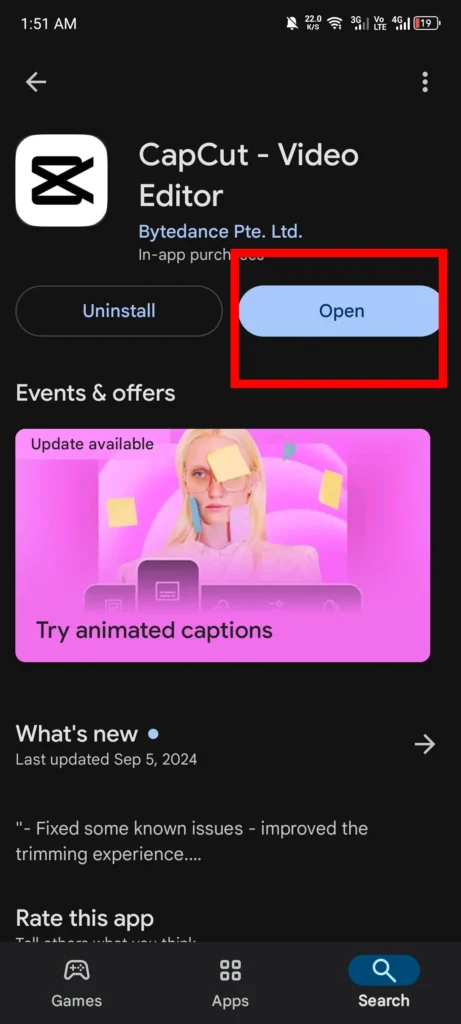
Step 1- Download the app
Install the CapCut application.
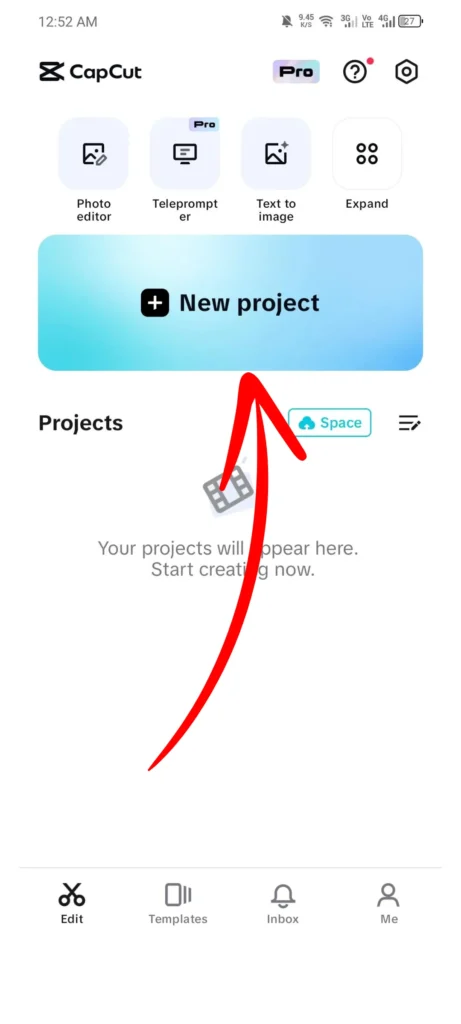
Step 2- Import video
Add video to the new project.
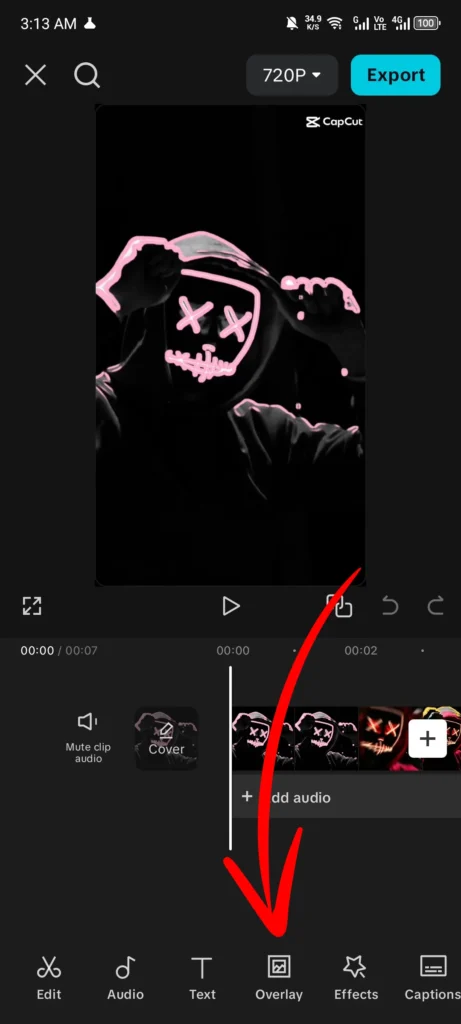
Step 3- Add the first overlay
Tap the overlay option and choose the first overlay content.
Step 4- Set the duration of the first overlay
Adjust the duration by dragging its edges.
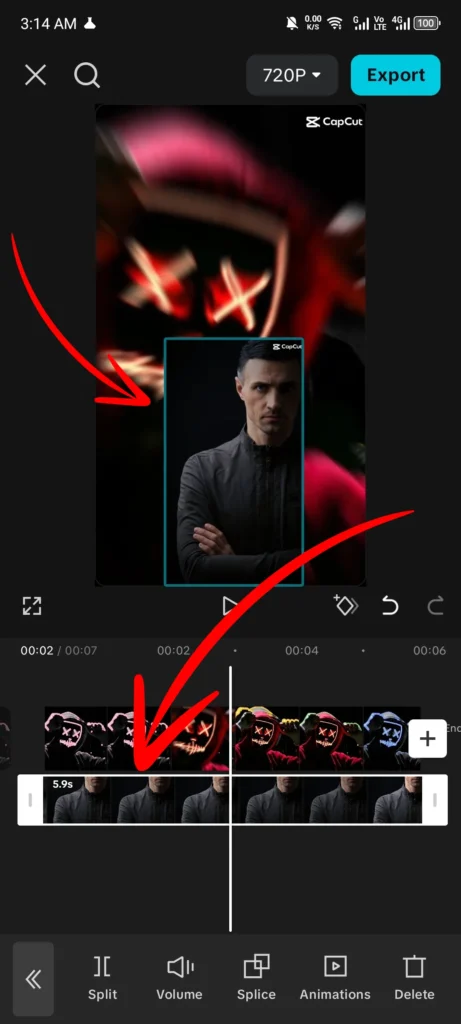
Step 5- Add the second overlay.
Again tap the overlay option and add content for the second overlay. Adjust its duration, size, and position.
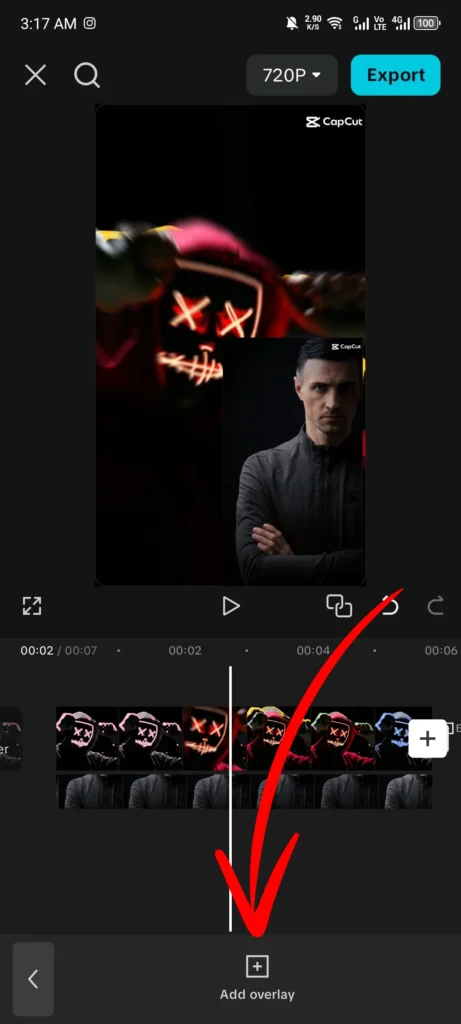
Step 6- Create a smooth transitions
You can add transitions to make the video smoother.
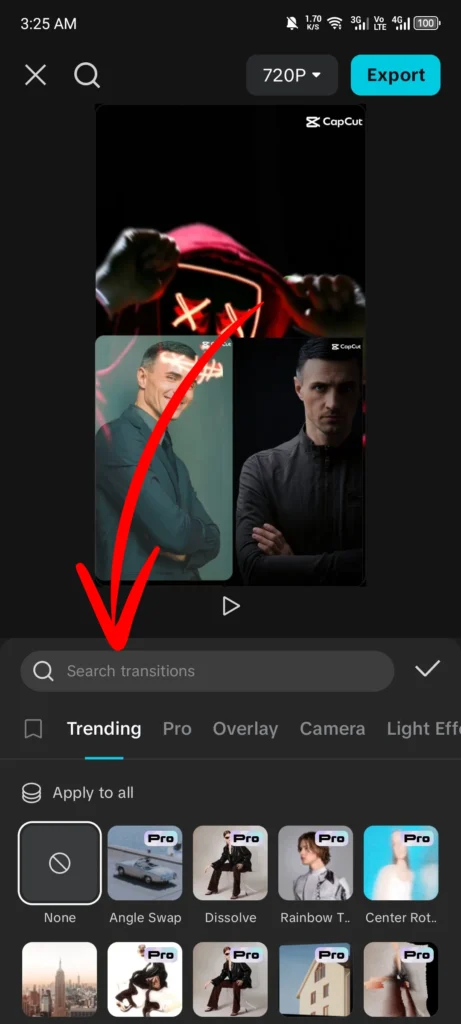
Step 7- Repeat additional overlays
Repeat the steps if you want to add more overlays.
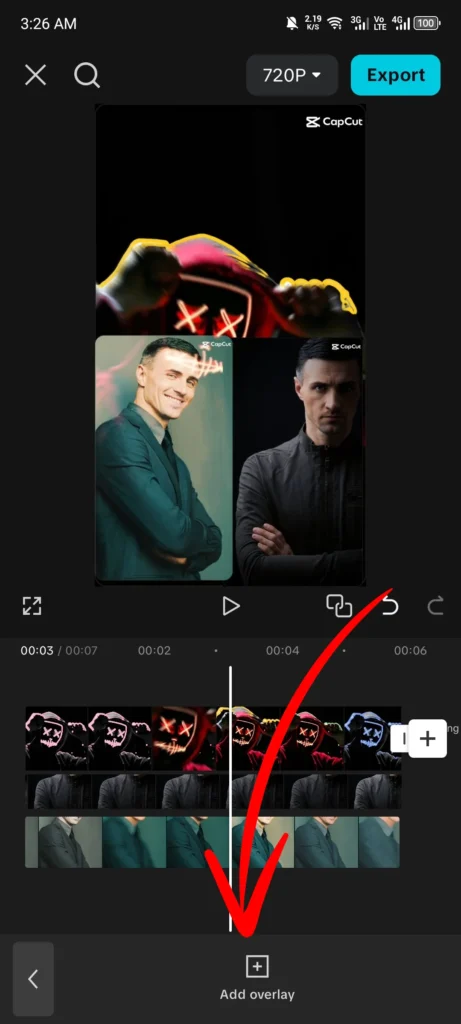
Step 8- Preview and export
Preview the video and export.
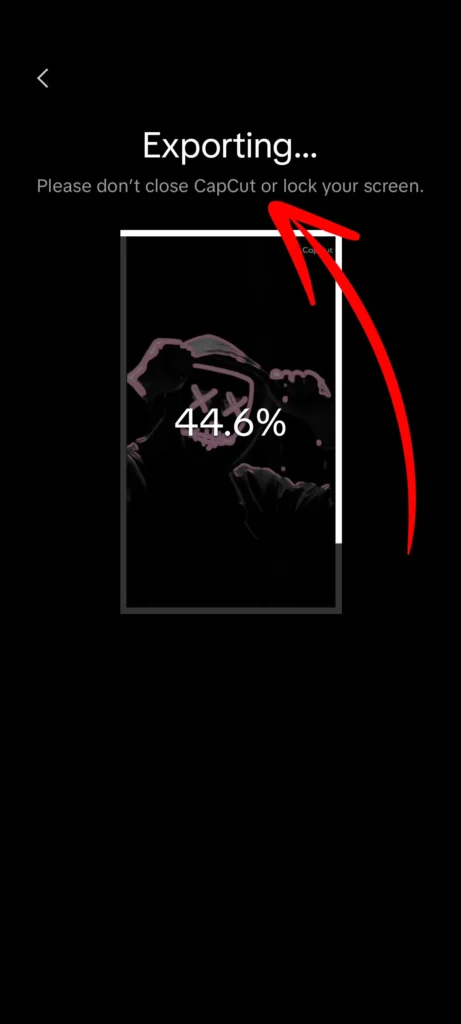
How to overlay the black screen in CapCut?
These steps will help you to overlay the black screen in CapCut,
Step 1- Open the app
Download and open the CapCut application.
Step 2- Import the main video
Import the original file.
Step 3- Add the black screen
Tap on the overlay button, select “add an overlay,” and select a black image from your device gallery.
Step 4- Adjust the black screen
Adjust its duration and position by dragging and moving it on the timeline.
Step 5- Edit opacity (Optional)
Tap on the overlay, select opacity, and reduce it.
Step 6- Export
Export the final video.
A CapCut Alternative
MiniTool MovieMaker is one of the most favorite alternatives to CapCut.
MiniTool MovieMaker
The best alternative to CapCut for adding overlays is MiniTool MovieMaker.It provides an intuitive interface for beginners as well as for experienced users. It is a solid choice for users looking for a free, simple, and reliable video editor. You can easily use this software to add overlays to your video and create a more stunning and professional look.
CapCut Overlay video vs. green screen: what’s the difference?
| Features | Purpose | How it works | Best use |
|---|---|---|---|
| CapCut Overlay video | Allows you to place one image or video on top of another. | The additional content sits over the base video without changing any part of the background. | Ideal for adding simple visual effects or layering media over your video. |
| Green screen | Allows you to remove specific colors from the overlay video. | CapCut detects the green color in overlay video and removes it, making it transparent. | Used when you want to integrate a subject in a different background. |
Final Verdict
After reading the article ‘How to add Capcut overlay text and video,’ you will be able to add overlays and learn about different overlay features.
Adding overlays is just one of CapCut’s main features. Download the app from the Google Store and enjoy its other robust features to enhance your project.
CapCut has made it easy to create artistic overlays, so keep experimenting and add a professional look to your projects. If you like the article, share it with your friends, and don’t hesitate to try CapCut’s features. Share your thoughts about this in the comment section.


